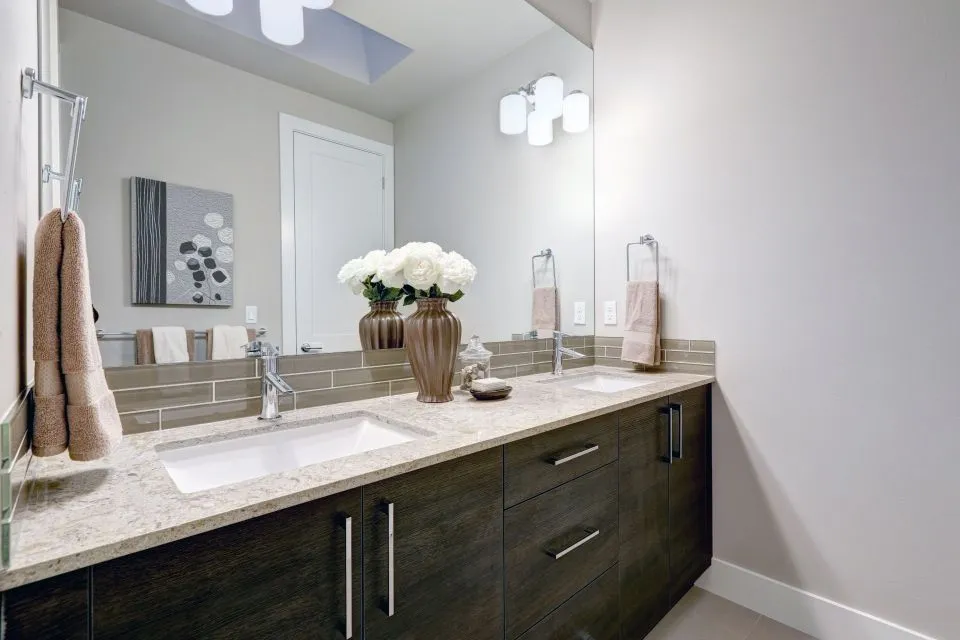
A Seamless Join Between Countertops and Backsplashes
A smooth transition between countertop and backsplash depends on more than matching colours. The joint must align with the cabinetry, accommodate normal movement, and look deliberate from every angle. Australian renovators often call the worktop a benchtop and the vertical surface a splashback, so these terms can help when discussing details with designers, cabinetmakers, tilers, and stone fabricators.
Open-plan kitchens are common in Sydney, Melbourne, Brisbane, Adelaide, and other Australian cities, making the countertop-to-splashback junction highly visible beside the sink or cooktop. The best result comes from planning the profile, wall preparation, and materials as one coordinated detail. The Countertop Store follows this approach when combining custom fabrication, precise templating, and installation for kitchens, bathrooms, and other remodelling surfaces.
Plan the junction before fabrication
Begin by deciding whether the joint should disappear visually, become a fine deliberate line, or provide a practical change of material. A continuous slab can create the calmest appearance, while tiled, metal-trimmed, and raised-edge options can add definition. The chosen detail should suit the room’s style and the way the benchtop will be used.
Australian kitchens often have a 600 mm cooktop, a bench depth of roughly 600–650 mm, and a finished working height between 850 and 900 mm. These measurements make it particularly important to coordinate the splashback with appliance cutouts, window ledges, tap positions, and cabinet upstands. Marking the intended junction on the wall before templating helps prevent an awkward trim later.
Keep the final design decisions in one place, including dimensions, appliance models, edge profiles, and finish samples. Independent renovation planning advice can be useful when checking the project before committing to fabrication. The installer should still verify wall levels, openings, and site conditions rather than relying on drawings alone.
Choose compatible backsplash materials
Matching the countertop and splashback in the same slab offers the strongest visual continuity. It also reduces the number of interfaces where dirt and moisture can collect. Full-height stone or porcelain splashbacks can extend the benchtop upward, with the joint positioned to complement cabinet doors, rangehoods, or windows.
Tiles remain a familiar choice in Australia, particularly the widely used 100 × 100 mm and 300 × 100 mm formats. Because tile faces vary slightly, their upper edge may need careful trimming or the grout line may need to be absorbed into the design. A slim trim can disguise minor irregularities while giving the junction a crisp, intentional finish.
Dark natural stone requires the same attention to its own characteristics. Homeowners comparing colours and maintenance requirements can read soapstone countertop guidance before selecting soapstone for an island or splashback. Its softer surface, patina, and visible grain need to be considered alongside the desired continuity.
Coordinate edges, upstands, and seams
The edge profile has a major influence on how the junction appears. A matching eased edge can make the benchtop and splashback read as one uninterrupted plane. A bevel, mitre, bullnose, or square arris creates a distinct outline, which may suit a bolder kitchen or a transition between two contrasting materials.
A fabricated upstand is often the simplest solution when the wall is flat and the stone is sufficiently thick for the chosen detail. Corners, window returns, and changes in height still need to be considered. Where the sheet material is too thin for a mitre, a metal or composite trim can provide the necessary protection without creating a fragile edge.
Templates must capture the finished wall and cabinet dimensions accurately. Appliance cutouts, sink choices, and splashback panels should be reviewed before the stone is cut. For a waterfall island, the joint can be aligned with a door opening or shifted so it follows the natural movement of the eye rather than interrupting the main feature.
Prepare the wall for an accurate set-out
Flatness matters because the countertop and backsplash are installed as a fitted assembly. Uneven walls, cabinet movement, and projecting tiles can leave a varying gap along the junction. Checking the wall plane, plumb, and cabinet tops before templating gives the fabricator a reliable surface to work from.
Tiled splashbacks require the upper edge of the tiles to be level and the wall build-up to be understood. The tiler and countertop fabricator should agree on who trims the tiles and where the finished joint will sit. This avoids placing the silicone line over a lipped tile edge or across an area that will crack under impact.
Bathroom work demands additional planning around waterproofing and wet-area detailing. Australian bathroom installations should use suitable waterproofing that complies with AS 3740, applied by a qualified applicator. Projects involving shower walls or other integrated bathroom surfaces can be discussed through bathroom surface services, helping coordinate the benchtop, splashback, and wet-area finishes.
Use a flexible joint where movement is possible
Silicone sealant is usually more suitable than rigid grout where the benchtop meets the splashback. Stone, tile, cabinetry, and framing can move by different amounts as temperatures change or the building settles. A narrow, consistently applied silicone joint can accommodate that movement without splitting the surface.
Before sealing, remove old adhesive, loose grout, dust, and residue. The exposed edges should be sound and clean, with the joint depth controlled rather than filled with an excessive bead. Masking and steady application help create straight edges, while the chosen sealant should be compatible with the stone, porcelain, tile, and nearby cleaning products.
At tile-to-benchtop junctions, the detail may also use a trim profile, recessed edge, or carefully filled grout line where movement is negligible. A metal strip can work well with darker quartz or granite, while a matching stone profile preserves a softer appearance. The detail should be selected before fabrication, as the fabrication method affects how precisely it can be installed.
Inspect the finished installation
Once fabrication is complete, compare the pieces with the approved template and check the colour, grain, edge, and dimensions before installation. The wall, cabinetry, splashback, and countertop should meet in the planned relationship. Small adjustments made before fixing the final piece are much easier than corrections made after the adhesive has cured.
The installer should check appliance clearances, sink fit, tap holes, sealant coverage, and the alignment of any visible seams. Integrated sinks and quartz shower pans also need correct support, level setting, and edge sealing. These details protect the installation and help maintain the smooth appearance of the junction.
Good aftercare preserves the result. Use a pH-neutral cleaner, avoid harsh solvents, and inspect the silicone line periodically for lifting or separation. In Australia’s measure-and-fit stone market, an installer who coordinates fabrication, templating, edging, and installation can provide a more consistent result. When the wall is prepared accurately, the profiles are coordinated, and the flexible joint is properly formed, the countertop and backsplash meet as a clean, durable part of the room.