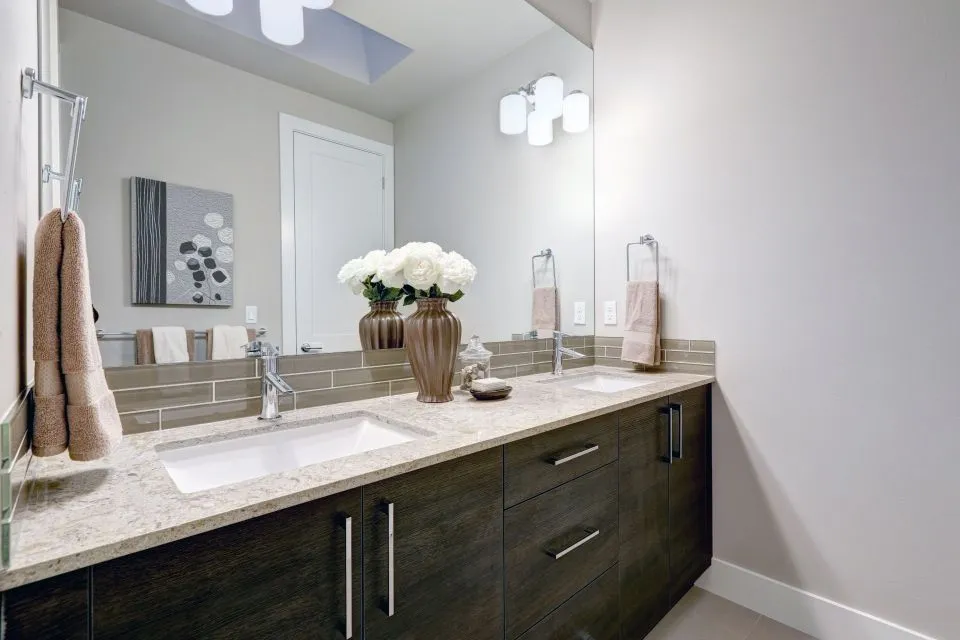
How to create a countertop with a floating shelf look for a bathroom
A bathroom countertop with a floating shelf look can make a compact room appear wider, cleaner and more architectural. The illusion comes from a substantial slab that appears to project from the wall without visible legs, cabinets or bulky brackets. Concealed supports handle the weight, while careful coordination of the basin, tap and waterproofing keeps the practical side of the installation just as considered as the appearance.
The strongest results begin with accurate measurements and a clear understanding of how the wall will carry the load. Stone and porcelain slabs are heavy, so the design must account for the countertop, basin, water and the occasional lean against the edge. Australian renovation conditions also make material selection important, particularly in humid climates and homes where bathroom cabinetry is tightly fitted into an existing footprint.
Plan the floating shelf proportions
Start by deciding how far the countertop should extend from the wall. A depth of 500–600 mm provides useful space for a basin while preserving the appearance of a shelf. Many Australian joinery plans use 600 mm cabinet modules, even when the finished vanity is wider, so the slab should align with nearby doors, niches or tiled edges rather than simply ending in an awkward position. In compact Sydney and Melbourne apartments, matching the existing wall lines can make the floating effect feel deliberate rather than cramped.
Measure the available wall from finished floor level to the underside of any mirror or window. Check door swings, shower screens, ventilation grilles and the position of electrical outlets before fixing the height. A countertop set too high can make the room feel enclosed, while one set too low may interfere with a standard basin waste or reduce usable leg room beneath a wall-hung design.
Decide whether the result should be a completely unsupported ledge or a wall-mounted vanity with a deep apron. A genuine floating appearance requires the visible cabinetry to remain behind the wall or be omitted altogether. A thicker front edge can suggest a substantial stone shelf, but it must not conceal an unsafe fixing or an inaccessible plumbing connection.
Choose materials for Australian bathrooms
Porcelain and quartz are often the most practical choices for this style. Porcelain slabs are thin, highly resistant to moisture and available in large formats that help minimise joints. Quartz provides a similarly smooth surface with more flexibility in edge detailing and integrated basin work. Both materials suit bathrooms where the countertop must project beyond the wall while remaining relatively restrained in weight.
Natural stone and engineered surfaces bring different characteristics. Granite is exceptionally durable and works well in family bathrooms, while marble offers a softer, more decorative appearance but needs careful sealing and maintenance. DEKTON is suited to demanding wet areas because of its resistance to heat and staining, whereas soapstone has a tactile quality that works well in a calm, natural palette. If timber is under consideration, this guide to timber worktop trade-offs explains where butcher block performs well and why moisture becomes the deciding factor in a bathroom.
Climate should influence the final choice. Humid conditions around Brisbane can accelerate movement, swelling or staining in porous materials, while Melbourne’s sharp seasonal temperature changes can reveal poorly sealed joints and fixing points. Quartz, porcelain and well-sealed granite generally provide the most dependable performance across Australian conditions. Whatever material is selected, its movement, weight and fixing requirements should be reviewed before the wall is prepared.
Engineer the hidden support system
The concealed support is the most important part of a floating bathroom countertop. Adhesive alone is never adequate for a stone or porcelain slab. The wall must be checked for framing, masonry, wall ties or added structural blocking, and the brackets need to be fixed into a suitable substrate rather than directly into plasterboard.
A continuous steel ledger, cantilevered shelf brackets or a purpose-built steel frame can carry the slab and basin. The support should be sized for the span, material, fixing type and expected load, including someone leaning against the front edge. Longer or thicker slabs may require engineering. A fabricator and installer can coordinate this detail, but the builder or structural engineer remains responsible for confirming that the existing wall can safely receive the concentrated load.
Set the brackets level and establish the required fall before the plumbing is enclosed. Stone slabs can be heavy enough to distort plasterboard or damage tiles if the wall is uneven. Shim packs or a level substrate help maintain the intended shadow line beneath the slab. Any penetrations through exterior-grade wet-area tiles should be sealed carefully without hiding leaks that may emerge later.
Plan how the countertop will be removed if a basin or tap needs replacing. A fully continuous stone installation may require specialist cutting and temporary support. Some designs incorporate a discreet access panel behind the basin, while others position the waste and isolation valves where they can be reached without dismantling the entire wall.
Coordinate the basin and plumbing
An undermount or integrated basin usually preserves the clean lines of a floating countertop. A stainless-steel undermount bowl is durable and visually understated, while a quartz basin carved from the slab creates a seamless transition from bowl to work surface. Porcelain can also support integrated bowl forms, although the fabrication method and slab thickness need to be confirmed before the design is locked in.
A wall-mounted tap keeps the countertop clear and strengthens the floating appearance. It also changes the plumbing layout because the water and waste connections run through the wall rather than sitting directly behind the bowl. Confirm the finished wall thickness, pipe positions and mixer height before templating. Tap holes must align precisely with the internal plumbing, and the waste must be set to create a consistent fall without creating a visible dip along the front of the basin.
Australian bathroom work should be carried out by appropriately licensed trades, with plumbing and waterproofing considered under AS 3740 and applicable local requirements. The wet-area membrane should continue behind exposed basin areas where specified, and pipe penetrations should be sealed before the countertop conceals them. Allow enough space behind the basin for ventilation so moisture does not become trapped between the wall and slab.
Choose the basin outlet and waste finish with maintenance in mind. Chrome fittings can pick up water spots, whereas brushed stainless steel or a matte black finish tends to show fewer marks. The access route to isolation valves should also be realistic, especially in a wall-hung design where no floor cabinet remains available to hide the connections.
Refine the edges and visual details
The edge profile determines how substantial the shelf appears. A mitred apron creates a deep, monolithic front edge, while a simple square edge produces a lighter, more contemporary silhouette. A 20–30 mm slab can look refined with a softened or eased edge, provided the chosen material and support system can carry the span. Decorative mouldings usually work better on wood than on porcelain, quartz or stone.
For a convincing floating effect, reduce the number of visible junctions. Carry the same material into a short backsplash, align it with wall tiles or extend it beside a shower screen. Alternatively, create a recessed niche behind the countertop so the slab appears to pass through the wall. Contrasting grout lines can frame the worktop, but a deliberate shadow gap beneath the front edge will usually look cleaner than trying to eliminate every line.
Lighting can make the installation feel more suspended. A concealed LED strip beneath the slab draws attention to the wall and the shadow gap, although it must be waterproof, accessible and positioned so the light does not create glare on a mirror. In a small Australian bathroom, a narrow shelf above the toilet or a recessed niche can provide storage without adding another bulky cabinet.
Keep styling restrained so the countertop remains the visual centre. Towel rails, soap dispensers and small storage containers work well when placed in the same palette as the stone or porcelain. A plant or a folded hand towel can soften the hard surfaces, but items should be stable enough for a wet environment and easy to remove when the area needs cleaning.
Coordinate fabrication and installation
Once the design is settled, the countertop should be measured and templated rather than estimated from a standard bathroom layout. The template should capture wall irregularities, basin cutouts, tap holes, splashbacks and the exact finished height. Digital measuring can support the process, but physical verification remains important, particularly around uneven walls or older homes with imprecise openings.
A specialist fabricator handles the slab selection, cutting, machining, edging and preparation of the openings. The Countertop Store’s consultation, measurement, templating, fabrication, edging and installation process provides the coordinated workflow needed for a floating design. Separate templates may be required for porcelain or other ultra-thin slabs, while quartz and natural stone can often accommodate more conventional fabrication methods.
Allow time for the support structure, plumbing, wall preparation and final installation to occur in the correct sequence. The slab should not be ordered until the basin type, tap configuration and support positions are confirmed. On installation day, the brackets and wall must be checked again, the countertop lifted into position and the joints sealed with the appropriate flexible sealant for the chosen material.
Budgets should include the slab, fabrication, template, installation, concealed support, basin, tap, plumbing changes and waterproofing. Australian quotes are commonly provided in AUD, so check whether GST is included and compare each scope on the same basis. Proper care then preserves the clean finish: use a pH-neutral cleaner, avoid harsh abrasives and arrange periodic resealing where the material requires it. The completed result is a bathroom countertop that reads as a weighty horizontal shelf while retaining a practical, supported and finely detailed installation.