How to Create a Seamless Quartz Countertop and Backsplash
A coordinated quartz benchtop and splashback can make a kitchen feel calmer, larger and more deliberately designed. When the surfaces share colour, pattern and finish, the transition between the worktop and wall becomes visually quiet rather than looking like two separate renovation decisions.
Quartz is especially suited to this approach because it is available in consistent slabs, from soft whites and warm neutrals to dramatic stone-look patterns. A fabricator can use the same design across the island, perimeter counters, upstands and full-height splashback, while careful templating keeps joins, cut-outs and edges aligned.
For Australian homes, the design also needs to respond to practical conditions: strong sunlight, compact kitchens, busy family routines and different state requirements for electrical and wet-area work. The best result combines visual continuity with accurate measurements, heat awareness, easy cleaning and installation by an experienced stone professional.
Start with the overall visual direction
Before choosing a slab, decide whether the room should feel soft and tonal or high-contrast and architectural. A pale quartz with fine veining can blend into white cabinetry and make a narrow kitchen in Sydney or Melbourne appear more open. A darker surface can anchor timber joinery, particularly in larger Brisbane or Perth homes with open-plan living areas.
The most seamless schemes usually repeat one dominant characteristic rather than matching every detail exactly. This might be a warm ivory background, a grey vein, a concrete-inspired texture or a subtle honed finish. If the benchtop has bold veining, use a calmer wall treatment or position the most expressive part of the slab behind the cooktop or island.
Cabinet colour, flooring, appliances and natural light should be considered alongside the quartz. Samples can look different under cool LED lighting, warm pendant lights and direct Australian daylight. Take larger samples home or view full slabs in a showroom, because a small sample may not reveal the scale, direction or density of the pattern.
Choose the right quartz layout
A full-height quartz splashback generally creates the strongest sense of continuity. Instead of stopping at a short upstand, the material travels from the rear edge of the benchtop to the underside of overhead cupboards, a rangehood or the ceiling. This reduces grout lines and gives the kitchen a refined, furniture-like appearance.
The slab layout matters as much as the colour. Veins should flow in a direction that supports the room: horizontal movement can make a compact wall seem wider, while bookmatched or vertically aligned patterns can emphasise a tall feature zone. Ask the fabricator to prepare a slab layout before cutting, especially where there are windows, power points, cooktops or open shelves.
Large splashback pieces can reduce visible joins, but they require precise access planning. Narrow hallways, staircases, lifts and tight apartment entries may affect whether a full slab can be carried safely into place. In inner-city Melbourne or Sydney renovations, access restrictions and strata rules may need to be confirmed before fabrication is scheduled.
Plan edges, joins and cut-outs carefully
A seamless appearance depends on details that are easy to overlook. The joint between the benchtop and splashback should be straight, narrow and filled with a flexible colour-matched sealant. A small movement joint is preferable to forcing rigid surfaces tightly together, as cabinetry and walls can shift slightly over time.
Edge profiles should support the design rather than compete with it. A slim eased edge suits a contemporary quartz installation, while a thicker laminated edge can give an island a substantial profile. Waterfall ends are effective when the vein direction and colour continue down the side, but they demand accurate mitring and careful slab planning.
Electrical outlets, tap holes and appliance clearances should be marked during templating. In Australia, electrical work must be completed by a licensed electrician, and requirements can vary by state and territory. The position of GPOs near sinks, cooktops and splashback surfaces should be resolved before the quartz is cut, rather than adjusted after installation.
Match the surface to Australian living
Australian kitchens often connect directly to dining, family and outdoor entertaining areas, so the benchtop is exposed to constant use. Quartz handles everyday food preparation well and has a non-porous surface that is straightforward to maintain, but it should still be protected from extreme heat. Use trivets for hot trays, slow cookers and cast-iron cookware.
Sun exposure is another consideration. A west-facing kitchen in Adelaide or Perth may receive intense afternoon light, and prolonged ultraviolet exposure can affect some engineered stone colours over time. Ask the supplier about the product’s suitability for direct sunlight before extending the same quartz to an outdoor kitchen, alfresco bar or sunroom.
Busy households also benefit from simple cleaning routines. Wipe spills promptly with mild detergent and water, avoid abrasive powders, and follow the manufacturer’s care instructions. Quartz does not require the periodic sealing associated with many natural stones, although the silicone junction at the wall should be checked occasionally for gaps or discolouration.
Australian building conditions can influence the installation as well. Renovations in Queensland may need to account for humidity and movement, while older homes in regional areas may have walls that are less than perfectly straight. A professional measure and template should identify uneven substrates, cabinetry issues and support requirements before the slab reaches the workshop.
Coordinate the splashback with the rest of the room
A matching splashback does not mean every surface must be identical. The island can use the main quartz, while a small section behind open shelving can introduce timber, glazed tile or a contrasting stone. Keeping the primary work zones in one material usually preserves the seamless effect without making the room feel flat.
If the design includes a sink, integrated quartz sink or drainer grooves, discuss fabrication limits early. A flush-mounted sink creates a clean line and makes wiping crumbs into the bowl easier, but the selected sink, cabinet construction and support system must be compatible. The The Countertop Store provides custom fabrication and installation services that include templating, edging and specialised surface work.
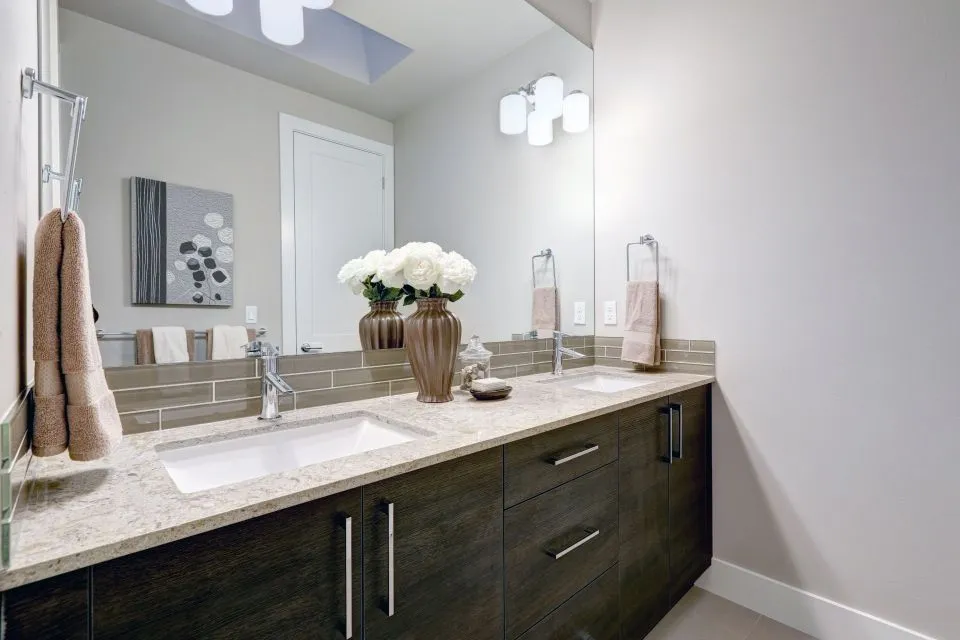
Bathrooms can use the same principle with a quartz vanity top, wall panels and shower details. Full-height panels reduce grout maintenance and visually connect the vanity to the shower area. However, waterproofing remains a separate building requirement: the wall system, junctions, falls and penetrations must comply with the relevant Australian rules and be installed by suitable licensed trades.
Hardware and lighting should be selected after the slab direction is established. Brushed brass can bring warmth to a creamy quartz, while black fixtures sharpen a cooler grey design. Under-cabinet lighting should be tested for glare, because reflective polished quartz may highlight uneven walls or make strong veining appear busier at night.
Work with the fabricator from selection to installation
A reliable process begins with a site consultation and accurate measurement. The fabricator should inspect cabinetry, walls, appliance locations, sink dimensions and access routes. Digital templating or a physical template can then record every corner, curve, overhang and service opening more accurately than measurements taken from a floor plan alone.
Slab selection should happen before final approval of the layout. Natural-looking quartz patterns may have directional veins, and some slabs contain areas that are better suited to an island than a narrow splashback. If a project combines several slabs, the visible joins should be placed in less prominent locations and discussed with the homeowner in advance.
It is useful to distinguish quartz from natural stone when comparing samples. Granite, marble, soapstone, porcelain, Dekton and engineered quartz each have different fabrication and care characteristics. A craft room or home laboratory, for example, may call for a surface with a different balance of heat resistance, texture and chemical tolerance; this soapstone countertop guide explains why that material can suit specialist spaces.
The installation sequence should protect the finished surfaces. Cabinets need to be level and adequately supported, walls should be prepared, and appliances must be available or accurately represented for final fitting. After the quartz is installed, the team should check joins, overhangs, sink alignment, splashback seals and the operation of drawers and doors.
| Design decision | Seamless option | Practical point |
|---|---|---|
| Wall coverage | Full-height quartz splashback | Creates visual continuity and reduces grout |
| Edge profile | Slim eased or square edge | Keeps a modern profile with easier fabrication |
| Pattern direction | Aligned or deliberately bookmatched veins | Makes the slab look planned rather than random |
| Sink treatment | Flush mount or integrated sink | Supports a clean transition and easier wiping |
| Finish | Polished or low-sheen matte quartz | Choose according to lighting, fingerprints and texture |
| Heat protection | Trivets and appliance clearances | Helps prevent thermal damage and discolouration |
| Installation | Professional measure, template and fitting | Reduces errors around walls, services and cut-outs |
A well-planned quartz countertop and backsplash combination should appear effortless because the technical decisions have been made early. Consistent colour, intentional slab placement and restrained detailing create the visual calm, while correct sealing, support, ventilation and electrical coordination keep the installation dependable.
For an Australian renovation, the final design should reflect the home’s light, climate, access conditions and daily habits. Whether the project is a compact apartment kitchen in Sydney, a family renovation in Brisbane or an indoor-outdoor entertaining space in Adelaide, a skilled fabricator can turn a carefully selected slab into a continuous, durable feature.