How to Create a Seamless Look with a Large-Format Porcelain Backsplash
A large-format porcelain backsplash can make a kitchen or bathroom feel calmer, broader and more architectural. With fewer grout lines and a continuous pattern across the wall, the surface becomes a visual extension of the benchtop rather than a collection of separate tiles. This approach suits contemporary Australian homes, where open-plan kitchens, compact layouts and indoor-outdoor living often call for finishes that look clean from every angle. Learn more about Die Kellersanierung Mit Digitaler Planung Uberraschungen Vermeiden 10f0.
The result depends on more than choosing an attractive slab. Slab dimensions, vein direction, cabinetry, power points, lighting, silicone joints and the skill of the installer all affect whether the finished wall appears seamless. Careful digital planning and precise templating are particularly valuable when a porcelain panel must wrap a corner, meet a window or align with a waterfall island.
| Design consideration | Large-format porcelain | Small-format tile | Natural stone slab |
|---|---|---|---|
| Visual effect | Continuous and streamlined | Patterned, detailed and more traditional | Rich, individual and luxurious |
| Grout visibility | Very low | High | Minimal, depending on slab size |
| Cleaning | Simple with fewer joints | More grout maintenance | Depends on sealing and stone type |
| Design flexibility | Strong for modern kitchens and bathrooms | Excellent for decorative layouts | Strong, with natural variation |
| Installation demands | High precision and specialist handling | More forgiving in small areas | Requires careful fabrication and support |
Why A Continuous Surface Feels More Spacious
Large porcelain panels reduce the visual interruptions created by grout lines. In a galley kitchen, this can make opposing walls feel less busy. In a smaller apartment in Sydney or Melbourne, a pale slab with a restrained stone pattern can reflect light and give the impression of greater depth without adding decorative clutter.
The format is especially effective behind a cooktop, sink or open shelf. A continuous surface lets the eye follow the movement of the porcelain pattern across the wall, while the absence of frequent joints keeps attention on the cabinetry and architectural lines. A bookmatched design can add drama, although a soft, cloudy pattern is usually easier to live with over many years.
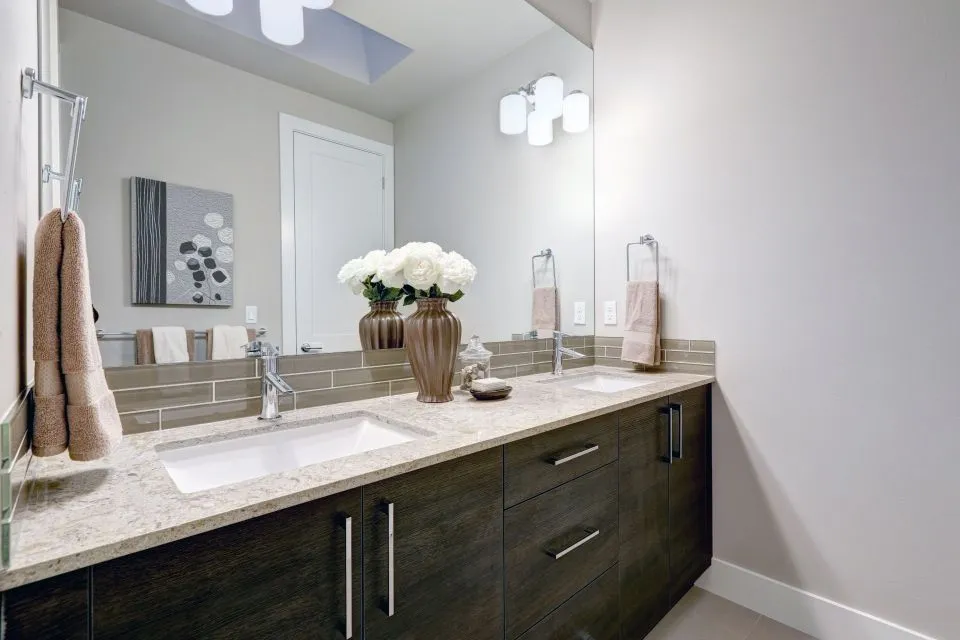
Large-format porcelain also works well in bathrooms. The same material can continue from a vanity splashback to shower walls, niches or a quartz shower pan surround, creating a coordinated wet-area scheme. In Brisbane and other humid areas, homeowners often value the low-porosity surface because it does not require the same sealing routine as many natural stones, although all joints and edges still need proper waterproofing.
Select The Right Slab For The Room
Porcelain is made from refined clays and minerals fired at high temperatures, producing a dense surface with strong resistance to heat, moisture, stains and ultraviolet exposure. It is available in marble-look, concrete-look, terrazzo-look and solid colours, giving Australian homeowners plenty of ways to match timber cabinetry, two-pack finishes or black tapware.
The appearance should be assessed as a full slab rather than from a small sample alone. A vein that seems subtle on a showroom card may become dominant across a two-metre wall. Ask to see the actual slab, or a high-quality image that shows its scale, repeat and directional movement. Check whether the design is printed only on the face or continues through the body, since exposed edges and cut-outs may reveal different visual details.
Thickness, reinforcement and edge treatment also matter. A porcelain splashback is thin and elegant, but it can be vulnerable at unsupported cut-outs or during handling. A professional fabricator will specify suitable backing, make clean openings and plan how the panel will be transported into the property. This is especially important in older terrace houses, narrow stairwells and homes with tight access from the street.
For Australian renovations, material selection should also reflect the local stone market. Engineered stone restrictions introduced nationally from 1 July 2024 have changed how many homeowners compare surfaces; porcelain, natural stone, Dekton and other alternatives are now receiving more attention. Porcelain is not a substitute for ignoring safe work practices, however. Cutting and polishing still require appropriate dust control and trained trades.
Plan The Layout Before Ordering
A seamless appearance begins with a detailed elevation drawing. Mark the benchtop height, wall cabinets, rangehood, open shelves, windows, doors, power outlets and lighting locations. The fabricator can then determine where the panel will start and finish, how the pattern will run and whether a joint is needed.
The ideal layout often places the most visible section of porcelain in the main sightline, with joins hidden behind a corner, appliance or cabinet edge. A single slab may cover a short splashback, while a larger wall may require two or more panels. A good joint can be subtle, but it should be planned rather than left to the installer on the day.
Digital templating is useful when the room has uneven walls or several fixed elements. It reduces the risk of ordering a slab that is technically large enough but unusable once allowances for corners, cut-outs and handling are considered. A digital planning guide illustrates the wider value of planning complex renovation work before construction begins; the same principle applies to a carefully measured splashback.
Allow for movement, expansion and the junction between different materials. The porcelain should not be hard-butted against cabinetry, benchtops or adjacent walls. Flexible, colour-matched silicone joints provide a neat finish and accommodate minor movement better than rigid grout. Your installer should confirm the joint width and sealant colour before fabrication.
Coordinate Cabinets, Appliances And Lighting
A successful splashback is designed with the kitchen rather than added after every other decision. Cabinet door colour, benchtop thickness, handles and tapware should support the porcelain pattern. A warm marble-look panel can soften white cabinetry, while a concrete-look slab may suit timber veneer and matte black fittings.
Power points deserve particular attention. Standard white outlets can interrupt a dramatic veined surface, while dark fittings may disappear into a charcoal panel. Some homeowners prefer outlets positioned under cabinets, but electrical placement must comply with Australian regulations and be completed by a licensed electrician. The final location should be confirmed before the porcelain is cut.
Rangehoods, induction cooktops and gas appliances also influence the design. Heat clearances must follow the appliance manufacturer’s instructions and applicable requirements. Porcelain handles heat well, yet the surrounding installation still needs correct spacing, ventilation and support. A fabricated opening should leave enough material around corners to reduce the chance of damage.
Lighting can change the character of the entire wall. Under-cabinet LED strips make veining more visible and expose unevenness in the substrate, so the wall must be flat and prepared properly. Warm white lighting generally works well with cream, beige and timber schemes, while cooler light can make grey porcelain appear sharper. Sample the slab under the actual lighting before committing.
Get The Installation Details Right
The wall substrate must be sound, clean, dry and sufficiently flat. Large panels do not disguise waves in plasterboard or masonry; they can highlight them. Depending on the property, preparation may involve removing old tiles, repairing plasterboard, levelling the wall or installing a suitable backing board. In a bathroom, waterproofing must be completed as part of the broader wet-area system rather than treated as a final sealant task.
Handling is a specialist operation. Porcelain panels are rigid, heavy and vulnerable at corners, cut-outs and narrow sections. Experienced installers use appropriate lifting frames, suction equipment and adequate support during positioning. They also plan access through doorways, hallways and staircases. A panel that fits the wall may still be impossible to manoeuvre safely through a renovated Queenslander or a compact inner-city unit.
Edges deserve the same attention as the face. A polished edge may suit an exposed end beside a tall cabinet, while a mitred return creates a more substantial appearance around a corner. Where the splashback meets the benchtop, a fine silicone bead usually provides a cleaner transition than a thick strip of grout. The joint should be tooled evenly and allowed to cure before heavy cleaning.
Fabrication quality is easier to judge through completed work than through promises alone. Reviewing customer testimonials can provide useful insight into communication, templating, installation and how a business handles detailed surface projects. Look for feedback that mentions the finished result and the process, rather than relying solely on photographs.
Extend The Design Beyond The Splashback
The strongest schemes repeat a small number of materials throughout the room. Porcelain can echo the tones in a benchtop, floor, fireplace surround or bathroom vanity without covering every surface in the same pattern. A restrained palette makes the large panel feel intentional and prevents the room from becoming visually flat.
For an Australian home, consider how the kitchen connects with the alfresco area. A similar colour family can link indoor cabinetry with an outdoor kitchen, while a more robust sintered surface may suit barbecue surrounds and entertaining zones. Coastal homes need particular care with exposed metalwork and sealants because salt air can affect fittings even when the porcelain itself remains stable.
The material can also inform custom furniture and architectural details. A stone or porcelain insert on a console, island end panel or outdoor table creates continuity without repeating a full-height wall. Ideas such as a stone coffee table show how fabricated surfaces can move beyond standard kitchen applications and support a broader interior design concept.
Maintenance is straightforward when installation is correct. Wipe spills with a soft cloth and pH-neutral cleaner, avoid abrasive pads on polished finishes and follow the fabricator’s guidance for silicone and grout care. Inspect joints occasionally, particularly behind sinks and cooktops. With considered slab selection, accurate templating and disciplined installation, a large porcelain backsplash can remain a quiet, continuous feature for years.