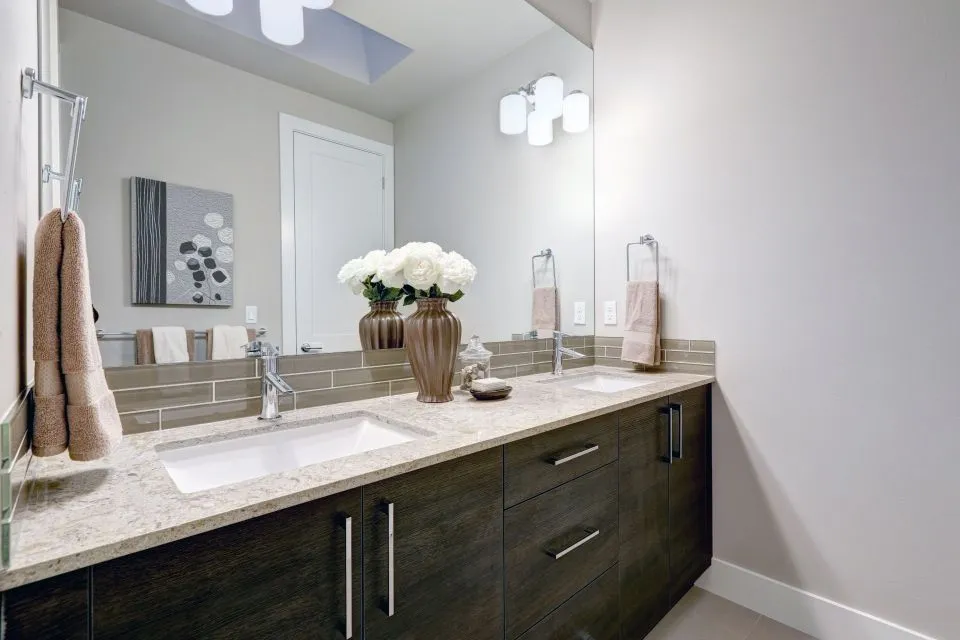
Matching glossy cabinetry with the right countertop
Glossy cabinetry changes the way a kitchen reads because light moves across the doors instead of settling into grain or texture. How to match a countertop to custom cabinetry with a glossy finish therefore begins with reflection: a pale, polished stone may disappear into cream doors, while a dark surface can make a small room feel sharper. The goal is a deliberate relationship between colour, sheen, pattern and scale.
A good pairing also has to work at the sink, under windows and around the splashback or backsplash. Gloss reveals dust, fingerprints and uneven joins, and stone pattern can look stronger beside shiny lacquer than beside timber. Comparing cabinet samples, stone offcuts and the effect of lighting before fabrication keeps the room coherent without making every element identical.
Gloss, colour and visual weight
Gloss comes in several levels, from a soft sheen to a mirror-like piano finish. Cabinet doors may use gloss lacquer, acrylic, thermofoil or painted MDF, while countertops can be polished, honed, matt or textured. When both surfaces reflect strongly, their meeting line can look harsh, so one finish usually needs to remain quieter than the other.
| Design direction | Glossy cabinetry | Countertop direction | Main consideration |
|---|---|---|---|
| Tonal match | Cream or warm-white doors | Pale quartz with a honed finish | Softens the room, but batch variation and yellow undertones can show |
| Crisp contrast | Ink, navy or black doors | White quartz or light porcelain with a polished edge | Creates clean definition; busy veining can overpower the doors |
| Pattern bridge | Putty or greige doors | Veined marble or granite | Relates natural movement to cabinet colour while adding depth |
| Warm balance | Forest green or muted blue | Timber, soapstone or warm beige stone | Offsets the shine with texture, though finishes differ in maintenance |
For a tonal scheme, place actual door and stone samples upright against the room, not flat on a bench. Check them beside the splashback and planned tap or sink finish in morning, midday and evening light. A near match often works best with one controlled variation: cloudy movement in pale quartz against smooth cream doors, for example.
For a contrasting scheme, let the cabinetry provide the block of colour and keep the worktop visually calmer. Black gloss doors with white quartz create crisp definition; deep green doors with pale veined stone feel richer. Avoid matching every element exactly, because repeated colour and maximum gloss can flatten the hierarchy instead of strengthening it.
Profiles, edges and fittings
The cabinet door sets the geometry of the room. Slab fronts and handleless glossy units create broad reflective planes, while shaker frames break highlights into smaller sections. Fine shadow gaps, clean internal corners and consistent reveals matter more once the doors shine, so the benchtop should follow the same disciplined lines rather than introduce a competing shape.
The countertop edge should echo those lines. A square eased or mitred edge suits flat cabinetry; a bevelled edge catches light and softens severe transitions; bullnose or waterfall profiles feel more relaxed and substantial. In Australian kitchens, 20 mm slabs commonly preserve visual lightness, while a 30 mm edge gives islands and perimeter worktops greater weight.
Hardware and fittings complete the comparison. Slim rails and integrated finger pulls continue the uninterrupted character of gloss doors, whereas visible brass handles add warmth and scale. An undermount sink preserves the clean run of stone, while an integrated sink makes the countertop and basin read as one glossy object. Choose hardware samples beside the edge profile, not in isolation.
Choosing a material for high-gloss doors
Quartz is often the most practical companion for high-gloss cabinetry because it offers consistent colour, controlled veining and a polished finish with fewer slab-to-slab changes than natural stone. Granite gives more individual movement but needs sealing according to the stone and finish. Marble is beautiful with lacquered doors, yet acids from citrus, wine and some cleaning products can etch its polished face.
Porcelain and sintered surfaces bring another set of strengths. Large porcelain panels can create tall splashbacks and slim counters, while UV-stable sintered stone such as Dekton suits sunny rooms and demanding kitchens. Finish performance deserves as much attention as colour. Lessons from hangar polyurethane flooring show how a glossy system in a hard-working environment depends on compatible chemistry and disciplined maintenance, a principle that carries directly into food preparation and wet areas.
Natural materials can provide welcome relief. Soapstone is usually matt or softly honed, so it gives glossy doors a tactile counterpoint, and its dark variation works especially well with pale cabinetry. Timber counters bring warmth but remain more sensitive to water around the sink. A polished stone beside glossy timber may look busy, whereas honed stone or a simple timber edge gives the shiny doors more breathing room.
When deciding between polished and honed stone, imagine the cabinet doors as a second reflective plane. A polished quartz or granite edge will echo their brightness and make a slim profile look crisp; a honed or leathered finish will scatter light and create a calmer border around the sink. Viewing a 100 by 100 mm offcut vertically can reveal how the two finishes interact.
Australian homes, light and buying habits
Australian homes often connect the kitchen with a dining area or alfresco, so a benchtop is seen from several angles and under changing light. A compact Sydney apartment may need a pale surface to preserve openness, while a Brisbane family kitchen with a large island can carry a deeper slab. Melbourne terraces and Adelaide cottages often have established proportions that should guide how bold a glossy palette feels.
Light is especially important in Australia. North-facing rooms can deliver steady daylight, while west-facing kitchens often take stronger late-afternoon sun that exposes surface sheen and can fade some cabinet films. Gloss may look warm under 3000 K LEDs but cooler under 4000 K profiles. View samples at night as well as by day, and check how under-cabinet lighting bounces from the splashback.
Australian project briefs commonly say full kitchen reno, benchtop and splashback, while measurements are commonly discussed in millimetres. The trade often works through a local joinery workshop or stone supplier: the customer chooses a slab or template, the fabricator measures after cabinetry is fixed, and supply, delivery and installation may appear as separate quote items. Clear inclusions prevent an inexpensive slab price from creating an unexpected local charge.
Humidity and coastal conditions deserve attention as well. Salt carried in from outdoor areas can reach indoor worktops, while humid climates can affect the movement of timber. Specify surfaces and edge details that can be wiped clean, allow suitable ventilation behind splashbacks, and avoid placing timber beside a dishwasher without a properly sealed panel.
From consultation to installation
Before any slab is cut, bring cabinet elevations, appliance measurements, the sink model and a sample of the doors to the consultation. Record the finished wall and cabinet dimensions rather than relying only on builder plans. Laser or template measurements taken after the carcasses and wall panels are level create a safer fabrication model, especially in homes with older walls.
During fabrication, the slab layout determines how veining travels across the worktop and where cuts, sink cut-outs and mitres sit. Edging can be polished, eased or matched to the chosen cabinet detail. Integrated sinks and slab backs require precise machining and careful handling, so drawings should show the finished reveal, drainage clearances and the exact position of taps and outlets.
On installation day, the sequence matters. Old surfaces may need removal, cabinetry may require final levelling, and new pieces must be carried in without damaging doors or splashbacks. Seams should align with the sink or a deliberate joint line, and silicone joints should be neat rather than used to disguise poor fit. A final inspection should cover level, overhang, edge continuity and the reflection under the room’s actual lights.
Care, durability and final checks
Gloss cabinetry and polished stone respond well to routine, gentle care. Use a soft microfibre cloth and diluted pH-neutral cleaner, wipe spills promptly, and avoid abrasive pads or solvent-heavy products that can dull lacquer. Stone should be cleaned according to its material; vinegar and acidic sprays can dull marble, while unsealed granite can stain. Keep silicone and oil away from joints and the base of cabinetry.
Timber requires a more attentive schedule because moisture and heat cause movement. Advice on butcher block care explains the need for prompt spill removal, controlled drying and periodic oiling, all of which help reduce warping and staining around a sink. A timber worktop beside glossy doors should therefore be chosen for warmth rather than treated as a low-maintenance match.
The most successful combination is the one that balances reflection, colour and practical use. Check cabinet doors, countertop samples, hardware and lighting together; confirm the exact slab or template; and record every finish and maintenance instruction before fabrication. This creates a coherent kitchen where the glossy cabinetry remains crisp, the worktop feels integrated and custom features such as a fireplace, mantel or outdoor kitchen continue the same visual language.