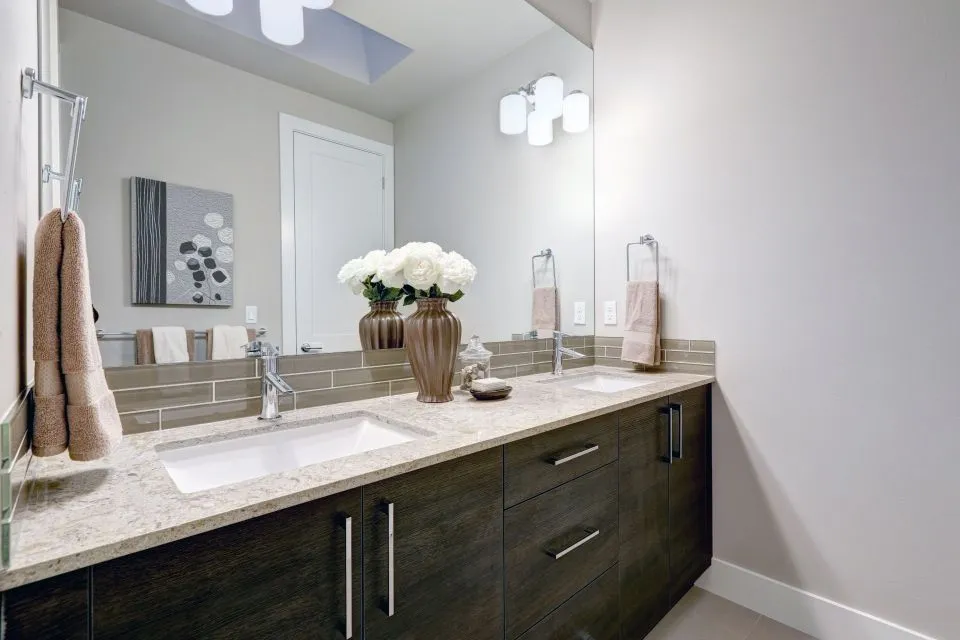
Designing a built-in towel bar countertop
If you are working out how to design a countertop with a built-in towel bar for a kitchen, treat the rail as part of the bench rather than an accessory added after installation. It should be within easy reach of the sink, clear of cabinet doors and appliances, and visually connected to the splashback, cabinetry and stone. Done well, it gives drying cloths, tea towels and oven mitts a dedicated home without taking over the working edge. Its position and construction should be settled while the kitchen is still on paper.
Australian kitchens benefit from planning in millimetres. Base cabinets are often 600 mm deep, with deeper runs around 650 mm, and widths of 450, 600 and 900 mm are common. A local measure-and-quote should confirm the finished bench rather than relying on a generic drawing. The towel bar needs enough projection for a folded tea towel but must not reduce elbow room or interfere with a dishwasher door. Record the sink, tap and appliance dimensions before choosing the rail’s location or profile, and check it against the finished bench height, which is commonly 850–900 mm.
The rail can do more than dry a hand towel. It can hold a strip of linen, a folded tea towel or a small oven mitt near the cooking zone. In a compact Melbourne terrace, a slim front-edge solution may work better than a bulky drop-down rack. A Sydney family kitchen with an island may need two coordinated locations, while a Brisbane kitchen opening to an alfresco area can benefit from a matching rail near the outdoor bench. The feature should remain useful after the kitchen has become busy rather than disappearing behind everyday clutter.
Early decisions also determine whether the detail is genuinely integrated. A recess cut into stone, a metal channel concealed beneath the front edge and a timber insert all require different fabrication methods. Measurements, templating, edging and installation should be handled as one coordinated process, especially around an undermount or integrated sink and a mitred edge. A fabricator can test the concept against the actual slab, cabinet boxes and site conditions before any cutting begins, reducing the chance of an attractive idea becoming impractical on site.
Plan the position around real clearances
Start by mapping the kitchen from the user’s point of view. The most useful position is usually on the front edge of the sink run, but standing space, the dishwasher swing, drawer runners and nearby cabinet doors matter more than a perfect elevation. Avoid placing the rail directly beside a hob where steam and heat can reach it, and check that a full-length tea towel does not touch a burner, sharp corner or tap lever. An island may need a second rail rather than forcing one location to serve every task.
Measure the actual clearances before settling on a profile. A towel needs roughly 300–400 mm of usable hanging length for a standard tea towel. The rail should sit low enough to be reached without stretching and high enough to stay above routine splashes and cabinetry. Ideally, allow around 100 mm between the rail and a drawer or appliance handle, and account for the floor zone if the rail projects into a walkway. Mark the sink centre, finished bench height and front overhang on a scaled plan. These details determine whether the feature belongs on the front, an end panel or a splashback return.
Choose how the rail is built in
A true built-in solution is integrated into the bench build. One option is a narrow metal channel routed into the underside of the front edge, creating a recessed slot with only the rail or a small pull tab visible. Another uses an apron panel fixed beneath the stone, with the towel bar mounted through the panel. A deeper stone edge can conceal a slim rail behind a mitred or bullnose profile. Each approach changes the bench appearance, so the final choice should reflect the stone thickness, cabinet box and desired cleaning access.
Construction details decide whether the feature lasts. Stone channels need sealed edges, rounded internal corners and enough remaining material below the slot. A fabricator should confirm that routing will not weaken the slab or interfere with reinforcement. Metal must be stainless steel or another corrosion-resistant finish in a wet kitchen. Timber ledges need ventilation, careful sealing and allowance for seasonal movement. Where a hot cooktop sits nearby, use a non-combustible insert and keep combustible tea towels away from the heat source. Avoid creating a deep cavity that traps water and cannot be dried properly.
Match the material to the kitchen style
Stone and hardware should make the rail feel deliberate. Pale quartz can carry a brushed stainless channel for a crisp, contemporary look, while honed granite suits darker metal and a softer, tactile finish. Porcelain and Dekton can offer slender possibilities through thin-profile fabrication, subject to the manufacturer’s engineering guidance. Marble and soapstone bring character but need disciplined sealing, particularly around a wet sink. Butcher block adds warmth and can accept a timber insert, yet its movement and moisture sensitivity require a stable junction designed by the fabricator.
Think beyond the worktop itself. The rail should echo, rather than compete with, the tapware, sink rim and cabinet handles. A mixed-material kitchen might pair a timber ledge with matte-black tapware, while an all-stone room can use a slim stainless line. For a kitchen opening onto a courtyard, garden design ideas can help coordinate indoor finishes with the external palette. In Brisbane and other sunnier climates, check outdoor stone and metal for UV stability, heat exposure and easy cleaning before repeating the detail on an alfresco bench.
Coordinate the detail with the whole kitchen
Coordinate the towel bar with plumbing, appliances and cabinetry before fabrication. If the sink has a tall pull-out spray, the rail should not block access to the spout. Keep storage drawers clear if a tea towel needs to hang beside the sink, and allow the dishwasher door to open fully if the rail sits at the end of a run. Near a wall oven or rangehood, check heat, handle projection and the path between the cooktop and fridge. A rail can share the splashback zone, but it should not make cleaning behind or beneath the bench difficult.
Colour coordination matters because a small metal element is read against a large stone field. A useful guide to quartz and hardware coordination shows how finishes can be balanced without making every component identical. Australian renovation quotes often separate supply, templating, edging and installation, and may or may not include GST. Ask for an itemised written quote so the allowance for the special detail is clear, then confirm whether the rail, template, delivery and old-slab removal are included before signing off.
Compare the main design options
The most economical arrangement may be a recessed channel in the front edge, provided the slab and cabinetry can support it. A full apron rail creates a stronger architectural feature and is easier to reach, but it reduces knee or walkway clearance. An end-panel solution suits a peninsula or L-shaped bench and is particularly handy when the sink faces into the room. In a family kitchen, two matching rails can serve the sink and cooking zone; in a compact one, a single well-placed rail usually looks calmer.
| Built-in approach | Best fit | Main advantage | Key caution |
|---|---|---|---|
| Recessed metal channel | Quartz, granite and porcelain benches | Clean line and easy towel access | Requires support, sealing and a safe residual slab thickness |
| Routed slot in stone | Thick slabs approved by the fabricator | Almost invisible hardware | Routing can weaken the slab and is not suitable for every edge |
| Steel or timber apron rail | Stone with a mitred or waterfall edge | Strong, substantial appearance | Can project into the walkway or reduce knee clearance |
| Timber insert | Butcher block and mixed-material benches | Warm contrast with a useful ledge | Needs sealing, ventilation and careful detailing |
| End-panel rail | L-shaped kitchens and peninsulas | Convenient when approached from the side | Less useful for someone standing directly at the sink |
| Surface-mounted channel | Retrofitting an existing bench | Quick to install and economical | Looks added-on unless the rail matches the profile closely |
Before fabrication, review the drawing, finish samples and responsibility for each component with the supplier. Reading customer testimonials can help you judge communication, cleanliness and installation care as well as the appearance of completed work. The Countertop Store’s process covers consultation, measurements, templating, fabrication, edging and installation, while a local Australian supplier can apply the same checks to local cabinetry, appliances and site access. A successful built-in towel bar looks intentional from across the room and works with one hand at the sink.